DEEPFAKES - an Introduction
Getting Started

To get started, we need to understand what we need to successfully create a Deepfake. Let’s start with the data: For every Deepfake, there has to be a source and a destination. You can think of it as the source from which we cut out the face and paste it onto the destination.
Therefore, the first logical thing to do is to collect a database of both the person you are trying to put a face on, and of the person from which you will borrow the face. There is ready-to-go data for download on the internet, but you will either have to dig deep or pay a small sum. A valuable ressource can be the datasets from known and respected “ctrl-shift-face” on his Patreon. (You will have to pledge a certain amount to gain access to his datasets.)
In my experience, interviews have proven themselves very valuable, since the focus often lies on the face of the person. Try to find preferably long videos with a high resolution (1920:1080 as a minimum) and the face filling out as much space of the frame as possible. Then, you can download the video(s) using either a download-api from a website that pulls videos directly from youtube, or - and this is my preferred method - use yt-download together with ffmpeg to minimize the loss of quality. Here is a tutorial on how to use both.
Once you have downloaded the videos (mp4, mov, mkv, avi and formats alike will all work) we will get to the extraction of the faces.
Extracting Frames
To extract the frames, I will be using ffmpeg. In short, ffmpeg is a collection of codecs and commands that lets you convert video- picture- and audio-files in different formats and variations. Our goal is to convert our SOURCE-video which we have download (presumably a .mp4, .mov, .mkv, .avi or something similar) into an image-sequence, since the deepfake-algorithm we will be using only works with images. To do that, use this type of code inside your command-prompt (cmd for windows, terminal for MacOS):
“ffmpeg -i input.mp4 -r 5 -output%04d.png”
I know, this looks intimidating at first, but let’s break it down:
“ffmpeg -i” tells ffmpeg to start converting something. “input.mp4” is out video, which we want to split into single images. After going to the folder which contains the video (using “cd path”), replace this part with the name of the video you have downloaded. Next up “-r 5” simply tells ffmpeg to set the frame-rate to 5, meaning 5 frames per second. Having the full framerate of a video (usually 30-60) split up into single images mostly bloats up the space required and is not always necessary for deepfaking. If you have very little footage of your source, leave out this command to extract every single frame. The strange naming of the output “output%04d” tells ffmpeg to use 4 digits after the filename and count the frames, resulting in a format such as “coolsource0001, coolsource0002, coolsource0003…” etc.
Now, we will do the same to the DESTINATION-video.
NOTE:
For the Source-Video, use a framerate between 5 and 15, depending on how much material you have, to end up with at least 20.000 images.
However, for the Destination-Video, you need to use the full framerate, as is required by most deepfake-algorithms. Thus, we use this command for the Destination-Video:
“ffmpeg -i input.mp4 -output%04d.png”
We intentionally left out the “-r 5” command, which we used for limiting the framerate. Thus, ffmpeg will extract every single frame from our input.


DeepFaceLab

Next up, we will need the actual libraries and algorithms used to create a Deepfake. Currently (27th of July 2020) the most convincing, fastest way to create a Deepfake is with “Deepfacelab”. It is shared by “iperov” on github and can be accessed here.
To download DeepFaceLab, scroll down until you reach “Releases”. Here, you can choose the latest release for the operating-system you are working with. I highly recommend using Windows with an Nvidia graphics card, since DeepFaceLab works very well with CUDA (which is exclusive for Nvidia GPUs as far as I know).
After downloading the proper release, you want to install every package that comes with your download. Additionally, (if you are using an Nvidia-GPU) you should definitely install CUDA and the latest cuDNN.
When both are installed, you need to enter the downloaded “cuda”-folder, enter the “bin”-folder and copy the “cudnn64_7.dll”. Then, go to “C:\Program Files\NVIDIA GPU Computing Toolkit\CUDA\v9.0\bin” and paste the file there. (I am not certain if this is an absolute requirement. The last step was taken from tech 4tress’ video on the DFL-installation.
I want to add that this step is one that I am not one hundred percent certain with. I highly recommend reading through the installation guide from DeepFaceLab itself (also to be found in iperov’s github release mentioned above) and follow every step. It might also be that new methods and updates are implemented there much faster than here.
Isolating Faces
When opening up the downloaded release of DeepFaceLab, we are greeted with two folders, namely “_internal” and “workspace”, as well as many Batch-Files. Those files essentially run certain commands in the console and execute specific python-scripts, which makes it a bit more pleasant to work with DeepFaceLab. Let’s open up and look at
_internal
The _internal folder holds all the libraries and scripts used for the Deepfaking-process. There usually is no reason to change or access anything in it. So let’s move on to
workspace
This is where the magic happens. If you open up the workspace-folder, you can see:
data_dst
data_src
model
There might also be two .mp4-files included, named “datasrc” and “datadst”. These are sample-files and can be deleted. “data_dst” is an abbreviation for data_destination. Same for “data_src” which stands for data_source.
Inside each dst and src folder, there need to be our extracted frames from our SOURCE and DESTINATION-Video respectively, so just copy them over.
Once we’re done with that, we will get into isolating the faces.
In my experience, the fastest and most precise method of extracting faces is using S3FD. Simply run:
“4.) data_src extract faces S3FD best GPU.bat”
“5.) data_dst extract faces S3FD best GPU.bat”
This should open up your command-prompt and run the extraction-process, like in the image to the right.
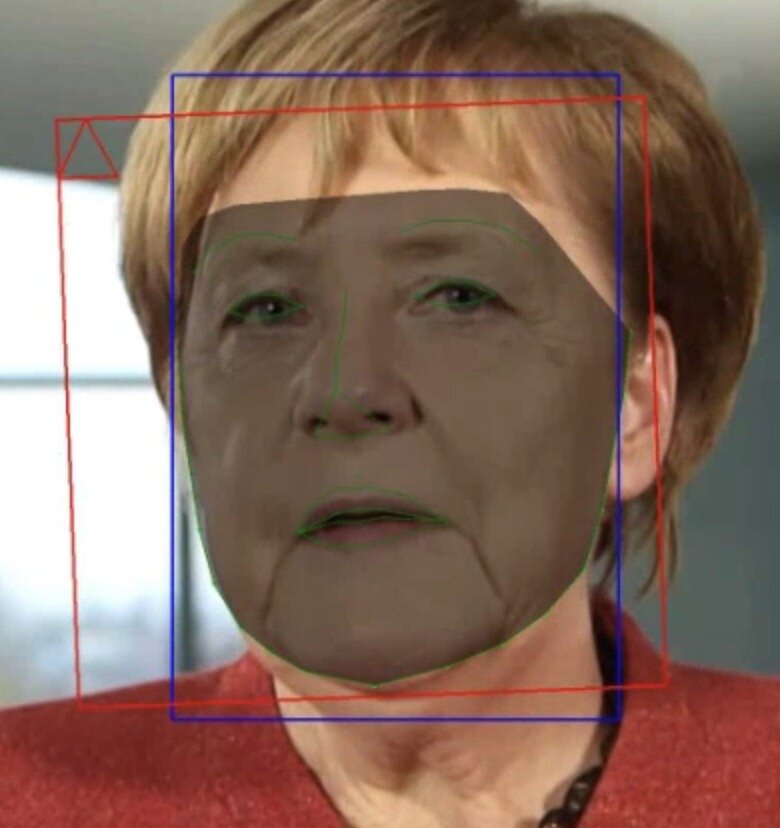
Once that is done, go back to our “data_src” and “data_dst” folders. Inside each of them, we should find a new folder called “aligned”. It’s called that because the face-extractor aligns each face, so that eyes, nose and mouth are always in the same spot for each image. However, the face-extractor is not perfect and does require some manual check-ups.
I recommend going through the huge pile of files in the windows-explorer and look for big chunks of useless images - sometimes shots don’t include our subject at all, so they all have to be deleted. This is a very important step since it can ruin the training of a model by only having about a dozen false images in your folder.


Sorting Faces
After we have deleted large chunks of unusable faces, we still need to do some cleaning up. The reason being that S3FD, the face-recognition algorithm (I suppose that’s the algorithm since it’s named in the batch-script) is not quite perfect. Sometimes, it might extract the face in a crude, contorted way, or the face of some other person or even no face at all.
Going through each face manually is a ridiculous amount of work though, considering we are aiming at a minimum of 20k images for each person. This is where our sorting-algorithms come to shine. Simply run these batch-files from the master-folder:
“4.2.2) data_src sort by similar histogram”
“5.2) data_dst sort by similar histogram”
This will essentially group faces together by their similarity. If faces of other people are included, they will be grouped in large chunks and it will be easier to delete them. Go through the folder one more time and be as thorough as you are willing to be.
Training the Model
Now we get to the exciting stuff. We have all our data stored and sorted correctly, which means we can get to the actual training of the model. To do so, simply run:
“6) train SAEHD.bat”
SAEHD is, at the time of writing this, the newest and best algorithm by DeepFaceLab which enables fast and accurate training. When you run the file, you will be asked a few things in the console. Here are the settings I used and the reasons why:
Resolution: 128 –> I trained with a GTX970, so 128 was a reasonable resolution.
face_type: f –> “f” meaning “full”, since we want to train the full faces.
learn_mask: y –> we want to learn the mask, since it cuts off the face just right.
optimizer_mode: 2/3 –> Mode 1 only uses the GPU’s VRAM, but 2&3 also use system memory.
architecture: df –> only df is compatible with “trueface” (becomes more important later on)
ae_dims: 512 –> Can be reduced if you run out of memory (to 256)
ed_ch_dims: 21 –> Can be reduced if you run out of memory.
random_warp: y –> randomly distorts the images, yielding better results from experience.
trueface: n –> turn this on after 20k+ iterations.
face_style_power: 10 –> for the first 15k iterations. After that point, set it to 0.
bg_style_power: 10 –> Set this to 0 after 15k iterations. Styles consume ~30% more VRAM.
color_transfer: LCT/rct-pc yields best results, I recommend trying every transfer-style, though.
clipgrad: n –> This can supposedly prevent crashes, so if your model collapses, turn this on.
batch_size: 8 –> Reduce this if you’re getting OOM (out of memory).
sort_by_yaw: n –> Only useful when you have very few source-faces.
random_flip: y –> Gives more variation to the material, can’t really hurt.

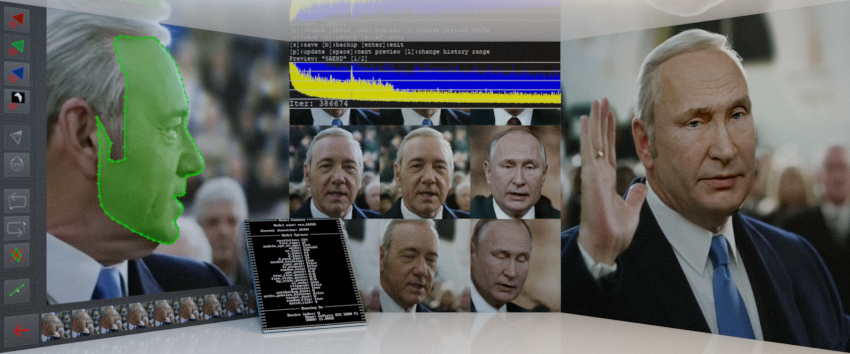
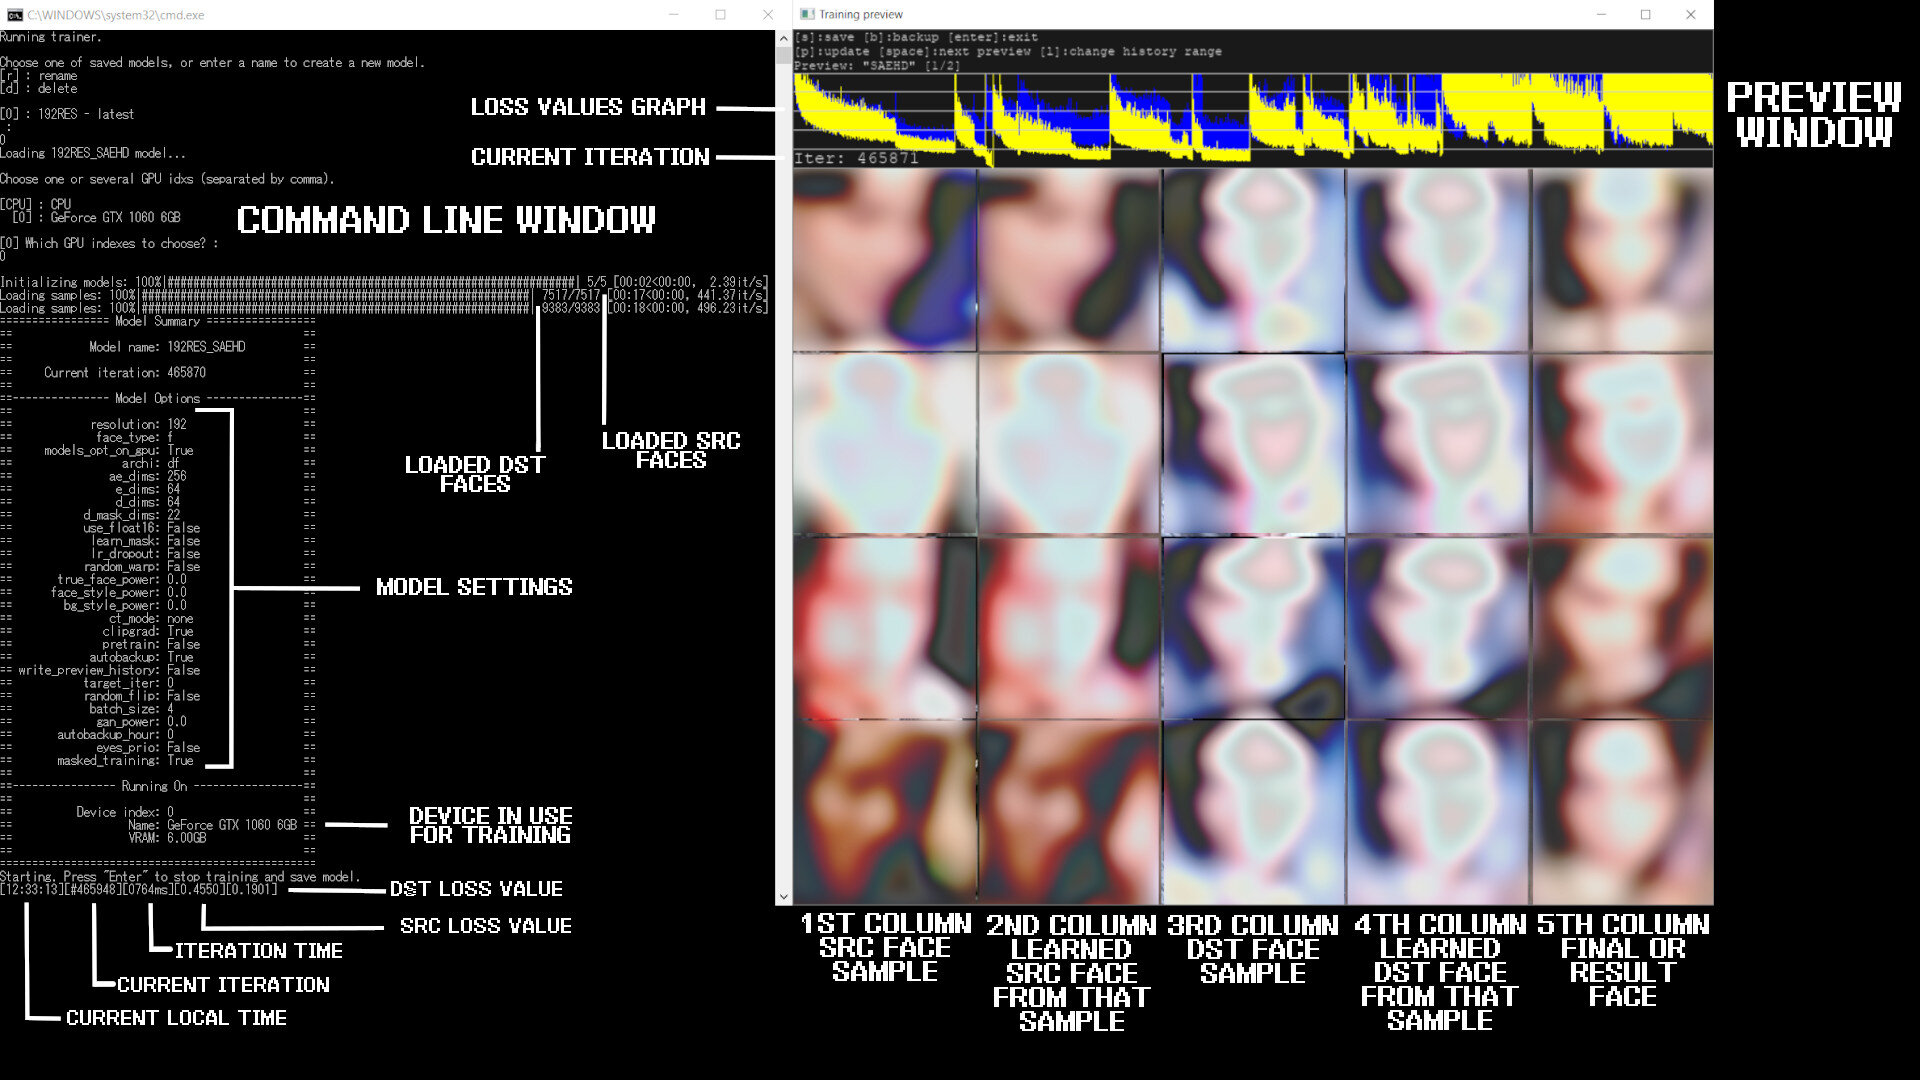
Now let this run for as long as you have the patience to wait. I usually let the model train overnight, since I am using a single GPU and not a cpu- or gpu-farm. You should aim for at least 20k iterations, but anything around the range of 100k iterations I would consider a fairly decent model. When looking at the preview (see the images above), you should be able to make out the teeth and eyes. If they don’t look weird, you probably did everything right. If not, check your dataset and then your training-settings.
At this point, I would like to note again that I am not a professional in this field. The main sources of information concerning the methods and settings that I use were experience, as well as this great guide by DeepFakeBlue and this reddit post.
Merging the Faces
Finally, we want to merge our source-data onto our destination-data. Do do that, we will use the interactive merger - a preview that allows us to tweak the settings and see the results immediately on a still-image of our final composition. To start the conversion, just run:
“7) convert SAEHD.bat”
And when asked “interactive_converter” enter “y”. This will open up a window titled “merger”.
You can switch between the shortcut-menu and the preview by pressing tab. Let’s go through every setting and I’ll try my best to explain what every option does.
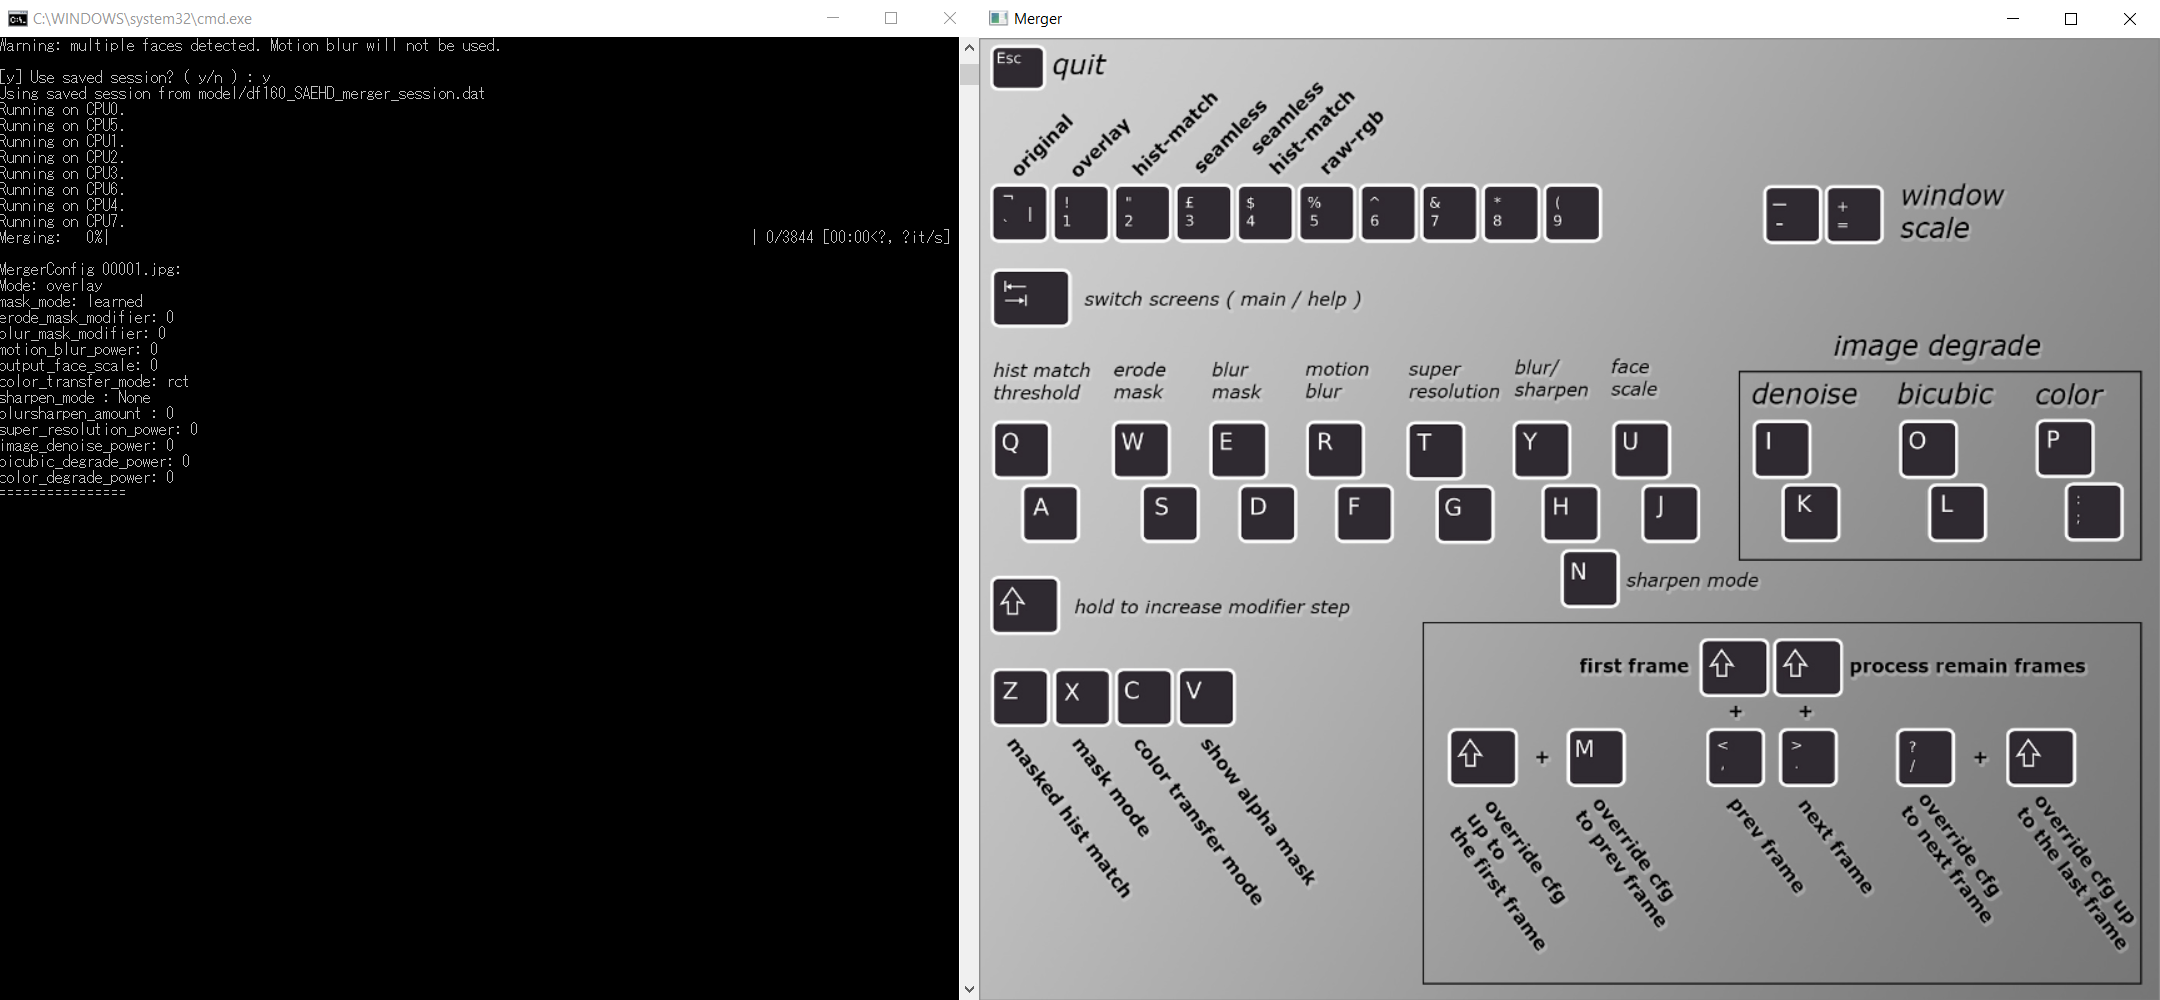
Let us start from top to bottom. The row of settings on the top are the “modes”. This directly determines how the faces will be pasted onto your destination-footage. You can press tab to switch to the preview and try out the different modes, but I have found that the only convincing mode was “overlay” in almost every case.
Next up, let’s take a look at the middle rows. First up, we have the “hist match threshold”. According to this paper I found, the hist match threshold determines how accurate the light that is cast upon our destination’s face will be applied. However, when using the “overlay”-mode, you will not be able to adjust this setting as it only works with “hist-match” and “seamless hist-match” according to this guide (WARNING: the link leads to a possibly NSWF website)
“Erode Mask” does exactly what is says. Eroding the mask might help if your trained face has some ugly edges or digital artifacts near the outer area of the face.
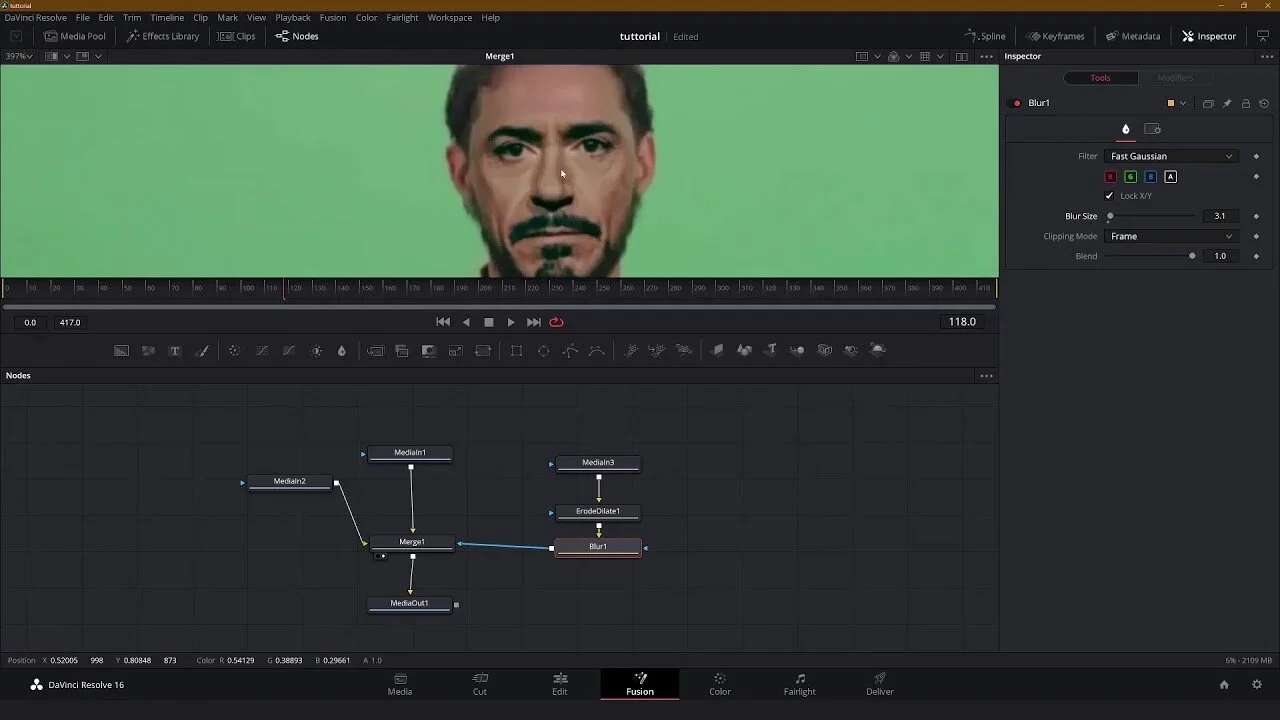
“Blur Mask” can help hide the edge between original footage and the deepfaked face, so make sure to crank that value up until the edge is least visible.
“Motion Blur” can add a little bit of realism by artificially applying motion-blur to the deepfaked face. This takes way more time to convert though, and if you have common knowledge in After-Effects or any other compositing-program such as Nuke or Fusion, you can easily add and adjust the motion blur afterwards. I recommend that you leave this setting off.
“Super Resolution” uses the RankSRGAN, another GAN, to upscale and enhance features of the face. This can especially help with areas around the eyes. Don’t overuse this setting, as you will quickly over-sharpen your image. Increase this setting until you find the face to look realistic and - more importantly - match the sharpness of your background.
“Blur / Sharpen” gives you the option to simply blur or sharpen your image further. This is rarely required from my experience.
“Face Scale” is another important option, scaling the face up or down. This can make or break your deepfake, so take your time to adjust the scale appropriately.
Now we get to the middle-right area, which gives us options for image degrading. These settings can help to degrade the deepfaked face so it matches the background, meaning the destination-footage. Play around with the three options until your face matches the background. If your destination-video is of decent quality, these settings are rarely needed from my experience.
If we take a look at the lower-left options, we can see that these shortcuts correspond to the settings of the mask. The mask is simply the alpha-channel of our face, so manipulating the mask changes the way the face lays on top of our original footage.
“masked hist match” has no use for the “overlay” mode.
“mask mode” lets you choose from these options:
dst: uses masks derived from the shape of the landmarks generated during data_dst faceset/dataset extraction.
learned-prd: uses masks learned during training. Keep shape of source faces.
learned-dst: uses masks learned during training. Keep shape of source faces.
learned-prd*dst: combines both masks, smaller size of both.
learned-prd+dst: combines both masks, bigger size of both.
XSeg-prd: uses trained XSeg model to mask using data from source faces.
XSeg-dst: uses trained XSeg model to mask using data from destination faces.
XSeg-prd*dst: combines both masks, smaller size of both.
learned-prd*dst*XSeg-dst*prd: combines all 4 mask modes, smaller size of all.
Try out each mode and see which fits your scene the best. In my experience, “dst” worked out fine in most cases.
“color transfer mode” is another very important setting. Try out the different modes, since the required mode differs from clip to clip. Most often though, “LCT” yielded good results.
“show alpha mask” does exactly what is says. If you turn this on and switch to the preview, you can see the masked area and even affect it with the other settings.
And that was it for the most important settings and what they do. Now, if you wanted, you could go through every frame using the shortcuts displayed on the bottom-right and adjust the settings for each frame if necessary. In most cases though, the settings fit for the entire clip once adjusted. Here’s what I like to do to speed up the process.
Look at the console (command-prompt) that opened when running the batch-script. In there, you will find each and every setting that you adjusted thus far. Take a screenshot using the snipping tool or something similar, and then close both the console as well as the preview-window.
Next, run the batch-script again but chose “n” when asked for the interactive converter. After doing so, you will be asked to enter your desired settings. Simply paste the settings of your screenshot into the console. You will also be asked if you want to export an alpha-mask. Type “y” if you want to adjust the face later, using a compositing-program such as After-Effects or Nuke.
Compositing
Almost at the finish-line! Our last step is compositing the face onto the background and making last adjustments in our compositing-software. This step is optional.
After you merged/convert all the faces and you will have a folder named "merged" inside your "data_dst" folder containing all frames that makeup the video. You will also find a png-sequence that will contain the mask for your face. The mask will be a white-on-black luminance-mask. This means that the brighter the area, the more opaque the image. Darker areas (grey) are more transparent and black areas are completely transparent.
Import both the merged image-sequence into your compositing-program as well as your mask image-sequence. In after-effects, you can simply as the “set matte"-effect and choose your mask-sequence as the matte, making sure it reads the luminance as alpha. You can now apply color-correction or other adjustments to that layer while only affecting the face.
In the end, all there is to do is to layer the un-masked “merged”-sequence under your corrected, masked face and export it. I recommend a h.264 .mp4 with a bitrate of about 5-10 for regular uploads onto youtube. If you plan to work with the file and edit it later on, I recommend exporting as a prores4444 .mov.
Conclusion
To be honest, writing this guide and researching the information for it has been quite an ordeal. What becomes apparent immediately is the lack of research and concrete information on in-depth aspects concerning deepfaking.
Much of the information collected here stems from reddit-posts, scarce research-papers, dubious NSWF-websites and sub-optimal guides providing conflicting information at times.
In the end, it has become apparent that the process of Deepfaking has not yet reached a level of consumer-friendliness and ease-of-use to claim that “anybody could do a Deepfake”. Although this is true on the literal level, I expect the majority of people to be quite overwhelmed and lacking the required knowledge on an IT-level to be completely confident in what they are doing (this also includes me, who only gained the knowledge required for a successful Deepfake after trying and failing many times.)
However, it will be quite interesting to observe what the future might hold for Deepfakes. I am convinced that, at some point, technology will become advanced enough and the usage of Deepfake-Algorithms easy enough to use that “regular” civilians will be able to create Deepfakes in a short amount of time with a short amount of manual work.
How to make Deepfakes easier:
In my opinion, the hardest parts in the process include the data-collection as well as using the batch-scripts and console.
To simplify the data-collection, it might be a good idea to use an automated process which only involves entering someones name, and the algorithm searching for interviews or videos which prominently feature the face of said person, before automatically grabbing the video-url, downloading the file and splitting the frames up in an image-sequence.
To simplify the handling of the scripts and single steps, it would be nice to have a comprehensive user-interface that everyone can use, even with little to no technical affinity.
I believe that Deepfakes have an intriguing future for sure. Debunking Deepfakes and trying to create un-debunkable Deepfakes will play cat-and-mouse like the coders of antivirus software and viruses are exhibiting now. Once we move to the point of replacing the entire body of someone (which there already is compelling research on), video-evidence will undergo a change so drastic that I will promise, everyone will talk about it.
Thank you for reading until the end. These are the main sources of information I have used to write this article:
Deepfakeblue’s Guide to Deepfakes
This reply by “planetoftheFakes” on a post on Reddit
The Github-page of the DeepFaceLab algorithm from “iperov”
This paper on the RankSRGAN for super-resolution